Category: Missions & Walkthroughs

Mission help and step-by-step walkthroughs based on verified gameplay, with spoiler controls where relevant.

  • GTA 6 Gone Fishing Walkthrough: Save Donnie, Trailer Cash and Seaplane

    GTA 6 Gone Fishing Walkthrough: Save Donnie, Trailer Cash and Seaplane

    Quick answer: This is the practical, source-checked GTA 6 Gone Fishing guide for GTA VI’s early Chapter 1 story. Follow the numbered objectives below, then use the FAQs if the mission marker, item or tutorial appears confusing. Note: This is independent editorial synthesis of published gameplay guides, not a claim that our staff played the mission firsthand.

    Mission facts and requirements

    PC Gamer chapter / index positionChapter 1 · #2
    Starting areaMariana County, starting on Cal’s boat
    Giver / playable characterCal; Jason playable
    Unlock requirementImmediately after the Prologue
    Reported rewardAccess to Jason’s Key Lento house
    Mission names are indexed to PC Gamer’s 91-entry list; steps and rewards follow independent released-game walkthroughs, November 18, 2026.

    Step-by-step walkthrough

    1. Pick up the dropped packages

    Steer the boat beneath Donnie’s plane, slowing as each package reaches the water so Cal can collect it. Use the minimap markers instead of racing ahead of the plane; a fast approach can prevent Cal from making the pickup.

    2. Observe the Kingfishers before landing

    Follow the route to Pelican Valley. Select binoculars from the item wheel and watch the meeting across the water. When Donnie is captured, dock and switch to Jason’s ground approach.

    3. Reach the shack with Donnie

    Stay low in the right-side vegetation and avoid unnecessary shooting. Melee knockouts can let you reach the target hut quietly; its main entrance is accessible. A hammer is reported behind the building if you want another melee option.

    4. Free Donnie and prepare for a fight

    Untie Donnie, then handle the heavy Kingfisher who enters the shack. Pick up the Zombix healing item after this encounter and use it before making the escape if health is low.

    5. Choose whether to collect optional cash

    On the way to the seaplane Donnie mentions money in a white-and-red trailer. You can enter, fight the waiting attacker and recover it, or leave without the money. This is an optional pickup during the mission, not a condition for progressing the story.

    6. Escape by seaplane

    Reach the seaplane dock without needing to defeat every guard. Follow the indicated flight path to Brian’s Marina and descend gently to land on the water. Continue the last marked return journey and the game moves into Jason’s home sequence.

    Secrets, optional interactions and missable pickups

    • Look behind Donnie’s shack for the reported hammer; confirm the pickup prompt before leaving.
    • The optional trailer cash changes your early-game resources and can be missed on a first pass.
    • Use binoculars to study nearby animals when safe; wildlife study progress contributes to a separate long-term collection.

    Mission FAQ

    Where is the cash in Gone Fishing?

    In the red-and-white trailer along the camp escape path. It is optional, and going inside may trigger an ambush.

    Can I complete Gone Fishing stealthily?

    Published guides describe nonlethal or stealth approaches to much of the camp; an unavoidable close-quarters confrontation occurs when freeing Donnie.

    What if Cal won’t pick up the packages?

    Bring the boat closer to the highlighted floating package and reduce speed, rather than chasing Donnie’s plane at full throttle.

    Do I need to kill every Kingfisher?

    No. Guides agree the mission’s escape objective is reaching the plane, not clearing the entire camp.

    More help and next missions

    Open our five-chapter 91-mission index for chapter navigation. Related guides: first mission prologue walkthrough spoiler light · gear up walkthrough ammunation kingfishers.

    Sources, spoiler policy and visual note

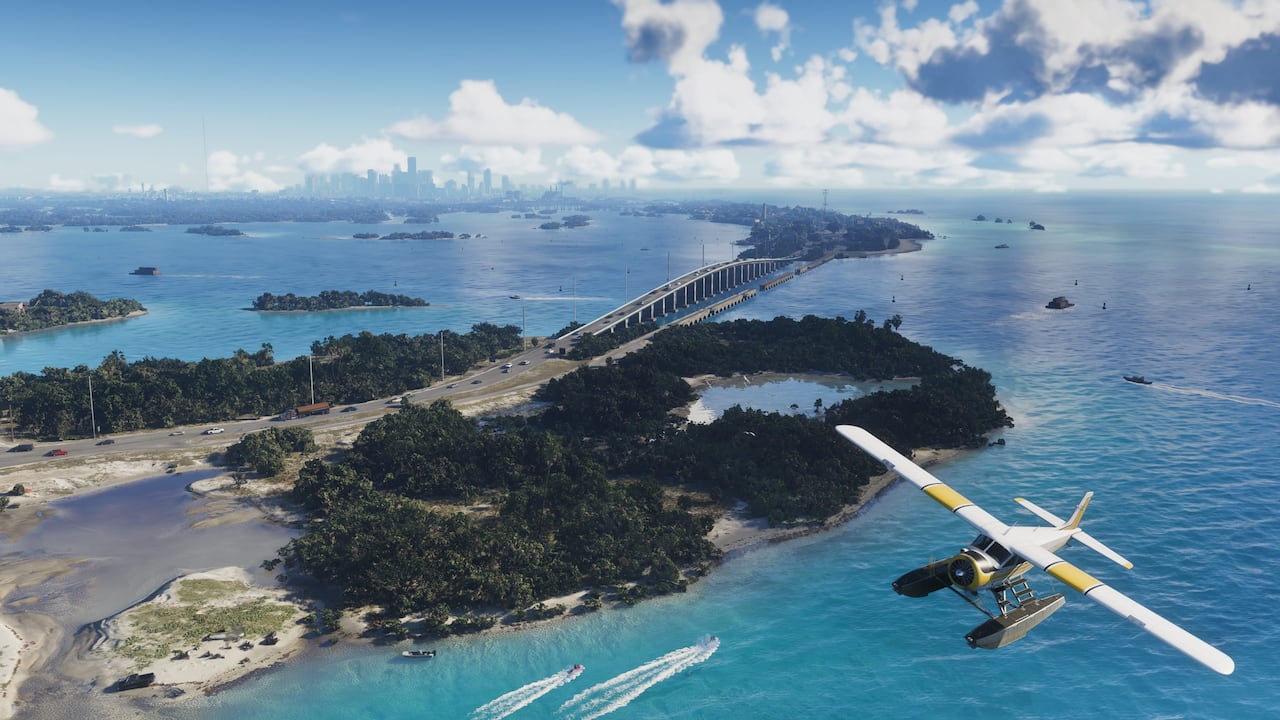
    Primary objective source: PowerPyx published walkthrough (Nov 18, 2026). Cross-reference: independent guide or PC Gamer mission index (Nov 18). This page describes mission mechanics and limited objective spoilers, not major unverified plot outcomes. Featured imagery is an official GTA VI promotional image from our media library, not a frame claimed to show this specific mission. If a later patch changes objectives or reward amounts, update the guide with a dated correction.


  • GTA 6 All 91 Story Missions: Five-Chapter List, Walkthroughs & Missables

    GTA 6 All 91 Story Missions: Five-Chapter List, Walkthroughs & Missables

    November 20: Pilot Pete’s extra money and missable hangar equipment

    New money route: PowerPyx documents Pete’s The Last Mile: Passing the Torch plane-recovery as providing approximately $12,000 through BuckMe, followed by delivery contracts paying around $20,000 each after Pete contacts the player again. These payouts are tied to story access and mission completion, not immediate money glitch loops.

    Missable gear: During the relevant plane recovery, inspect the hangar’s back room for Pete’s KZ-59 assault rifle and a safe using code 3718. Do not treat that combination as a universal code for unrelated robberies. Detailed steps are at our dedicated Pete reward guide.

    Keep players on site: For how aircraft and hangars work link to flying and aircraft; for the chapter questline start with Clear Skies. Source: PowerPyx mission report, November 18.

    November 19 mission-count reconciliation: why some lists say 94

    PC Gamer’s November 18 walkthrough index numbers 91 main story missions across five chapters (22, 11, 26, 25 and 7). A separate November 19 GTA6 LIFE index counts 94 by adding three entries attributed to IGN’s mission wiki: Building a Life (Chapter 1), Overnight Charges and Thrillbillies (both Chapter 2). The competing totals describe different editorial inclusion rules; they are not proof that Rockstar added three missions overnight.

    Our index retains PC Gamer’s 91-mission numbering for continuity and marks these three entries as separately indexed until their exact main-story versus optional status is established from original game objectives. Avoid interpreting the mission-number discrepancy as a save corruption, incomplete download or a suddenly released expansion. PC Gamer reference.

    Quick answer: PC Gamer’s November 18, 2026 launch-day list groups GTA VI’s 91 story missions into five chapters: 22 in Chapter 1, 11 in Chapter 2, 26 in Chapter 3, 25 in Chapter 4 and seven in Chapter 5. The lists below provide the mission names in that editorial order, with links to our independently researched walkthroughs wherever available. Names and chapter titles may spoil the story. Three entries remain deliberately unnamed to protect major plot surprises.

    How to navigate: Chapter 1 (22) · Chapter 2 (11) · Chapter 3 (26) · Chapter 4 (25) · Chapter 5 (7) · Mission troubleshooting · Missable quests.

    How this index differs from mission walkthroughs

    This is a mission directory, not 91 claimed hands-on walkthroughs. PC Gamer lists the story missions and short contextual blurbs, while PowerPyx separately counts many smaller objectives and optional missions. PowerPyx warns that mission order can vary and a map pin can have a different label from the mission name shown when the job begins. We use PC Gamer’s names here for consistency, and add our own objective steps only where source-backed instructions exist.

    Chapter 1: Just Like Paradise (22 missions)

    Most of our first-wave objective guides cover this chapter. A few early missions become available alongside one another, so this is a reference order, not a requirement to complete simultaneous jobs in a particular sequence.

    In-chapter #Mission nameOur guide status
    1PrologueSource-checked walkthrough
    2Gone FishingSource-checked walkthrough
    3Gear UpSource-checked walkthrough
    4Just a ScratchSource-checked walkthrough
    5Lab FeesSource-checked walkthrough
    6Unwanted AttentionSource-checked walkthrough
    7PipeworkSource-checked walkthrough
    8Hey Arnold!Source-checked walkthrough
    9Island DreamsSource-checked walkthrough
    10Feng ShuiSource-checked walkthrough
    11Coming HomeSource-checked walkthrough
    12Buck MeSource-checked walkthrough
    13Clean Up After DonnieSource-checked walkthrough
    14Down to EarthSource-checked walkthrough
    15Clear SkiesSource-checked walkthrough
    16Day ReleaseSource-checked walkthrough
    17SwampedSource-checked walkthrough
    18Undisclosed — story spoilerHidden by PC Gamer to avoid spoilers
    19RecalibrationSource-checked walkthrough
    20Tourist TrapIndex entry; walkthrough pending individual research
    21Home Sweet HomeIndex entry; walkthrough pending individual research
    22Discharge TimeIndex entry; walkthrough pending individual research
    Mission names and order cross-referenced to PC Gamer (Nov 18); guided entries link to separately sourced Leonida Scene articles.

    Chapter 2: Paradise Lost (11 missions)

    In-chapter #Mission nameOur guide status
    1What’s in the Bag?Index entry; walkthrough pending individual research
    2Ambulance ChaserIndex entry; walkthrough pending individual research
    3Just Moved InIndex entry; walkthrough pending individual research
    4Girls’ TripIndex entry; walkthrough pending individual research
    5MosesIndex entry; walkthrough pending individual research
    6Daily DriverIndex entry; walkthrough pending individual research
    7Slam DunkIndex entry; walkthrough pending individual research
    8Breakfast RunIndex entry; walkthrough pending individual research
    9Coffee BreakIndex entry; walkthrough pending individual research
    10Afternoon DelightIndex entry; walkthrough pending individual research
    11Checking OutIndex entry; walkthrough pending individual research
    Mission names and order cross-referenced to PC Gamer (Nov 18); guided entries link to separately sourced Leonida Scene articles.

    Chapter 3: Tits Ass Drug Money (26 missions)

    In-chapter #Mission nameOur guide status
    1Welcome to Vice CityIndex entry; walkthrough pending individual research
    2Dealer’s ChoiceIndex entry; walkthrough pending individual research
    3Meet the HedersIndex entry; walkthrough pending individual research
    4Dubious ProvenanceIndex entry; walkthrough pending individual research
    5Mami Knows BestIndex entry; walkthrough pending individual research
    6South Leonida Real EstateIndex entry; walkthrough pending individual research
    7TyroneIndex entry; walkthrough pending individual research
    8Here, Kitty KittyIndex entry; walkthrough pending individual research
    9Car ServicesIndex entry; walkthrough pending individual research
    10Top BillingIndex entry; walkthrough pending individual research
    11Boobie TimeIndex entry; walkthrough pending individual research
    12First ImpressionsIndex entry; walkthrough pending individual research
    13Caught SlippingIndex entry; walkthrough pending individual research
    14Crosstown TrafficIndex entry; walkthrough pending individual research
    15Credit CheckIndex entry; walkthrough pending individual research
    16Steal the Zorruso for RandyIndex entry; walkthrough pending individual research
    17Sinfrontera National BankIndex entry; walkthrough pending individual research
    18Security ExpertIndex entry; walkthrough pending individual research
    19Ride or DieIndex entry; walkthrough pending individual research
    20Company PropertyIndex entry; walkthrough pending individual research
    21The Missing LinkIndex entry; walkthrough pending individual research
    22Safe WordIndex entry; walkthrough pending individual research
    23CootiesIndex entry; walkthrough pending individual research
    24Bricked UpIndex entry; walkthrough pending individual research
    25Hidden ChargesIndex entry; walkthrough pending individual research
    26The Cartel HeistIndex entry; walkthrough pending individual research
    Mission names and order cross-referenced to PC Gamer (Nov 18); guided entries link to separately sourced Leonida Scene articles.

    Chapter 4: Vice City, Baby (25 missions)

    In-chapter #Mission nameOur guide status
    1Ocean BeachIndex entry; walkthrough pending individual research
    2Another LifeIndex entry; walkthrough pending individual research
    3Company CarsIndex entry; walkthrough pending individual research
    4Lawyer UpIndex entry; walkthrough pending individual research
    5Party HardIndex entry; walkthrough pending individual research
    6Heavy LiftingIndex entry; walkthrough pending individual research
    7Photo/ShootIndex entry; walkthrough pending individual research
    8Making GainzIndex entry; walkthrough pending individual research
    9Watch ItIndex entry; walkthrough pending individual research
    10Cash InjectionsIndex entry; walkthrough pending individual research
    11Amateur HourIndex entry; walkthrough pending individual research
    12Dirty WorkIndex entry; walkthrough pending individual research
    13Too Much BaggageIndex entry; walkthrough pending individual research
    14Adventures in BabysittingIndex entry; walkthrough pending individual research
    15Fresh EvidenceIndex entry; walkthrough pending individual research
    16Power PlayIndex entry; walkthrough pending individual research
    17Child’s PlayIndex entry; walkthrough pending individual research
    18HeadlinersIndex entry; walkthrough pending individual research
    19Close SurveillanceIndex entry; walkthrough pending individual research
    20Delivery MethodIndex entry; walkthrough pending individual research
    21Team BuildingIndex entry; walkthrough pending individual research
    22Fully CateredIndex entry; walkthrough pending individual research
    23VCIA TakedownIndex entry; walkthrough pending individual research
    24SunsetIndex entry; walkthrough pending individual research
    25Undisclosed — story spoilerHidden by PC Gamer to avoid spoilers
    Mission names and order cross-referenced to PC Gamer (Nov 18); guided entries link to separately sourced Leonida Scene articles.

    Chapter 5: Top of the World, Ma (7 missions)

    Spoiler caution: the final entry is intentionally unnamed in PC Gamer’s public list.

    In-chapter #Mission nameOur guide status
    1Bird in the HandIndex entry; walkthrough pending individual research
    2Taking LibertiesIndex entry; walkthrough pending individual research
    3VC BabyIndex entry; walkthrough pending individual research
    4Doggie BagIndex entry; walkthrough pending individual research
    5Operation Savage GloryIndex entry; walkthrough pending individual research
    6Protective CustodyIndex entry; walkthrough pending individual research
    7Undisclosed — story spoilerHidden by PC Gamer to avoid spoilers
    Mission names and order cross-referenced to PC Gamer (Nov 18); guided entries link to separately sourced Leonida Scene articles.

    Why does PowerPyx give different mission numbers?

    PowerPyx numbers a wider objective-by-objective sequence, including tutorial-like jobs, optional errands and preparatory tasks. PC Gamer’s published 91 is a narrower chapter-by-chapter story presentation. Neither should be called Rockstar’s official complete mission count: Rockstar has not released a matching 91-entry public master list, and story missions can appear in different playable orders.

    A mission is missing, locked, or won’t start — what to check

    • Open the map and select the pink story-book icon to expand available main missions (PowerPyx’s reported interface).
    • Look for a pink pin with dark letters for required story jobs; optional missions use different icon colors.
    • Check the map marker’s title and your incoming texts/calls, because the actual mission title can differ from its starting prompt.
    • When no new story marker appears, finish another available main mission or sleep/advance in-game time.
    • If objectives appear stuck, record your console, installed version, the last checkpoint and on-screen objective before trying a restart. Keep manual saves instead of deleting progress.
    • Try our failed-mission and checkpoint guide; it does not assume all missions share identical skip rules.

    Missable tasks, chapter boundaries and secrets

    PowerPyx flags some hourglass-marked optional tasks as time-sensitive, including Shirley’s early requests in Chapter 1, Yago’s racing opportunity in Chapter 3 and a Chapter 4 call-related errand. These are not part of PC Gamer’s 91-story count, and PowerPyx says they are not essential for the standard 100% trophy checklist. To avoid missing optional scenes and collectibles, see our missable mission and Easter egg guide.

    For the Chapter 1 transition in particular, PowerPyx warns that Recalibration leads to a period with limited free roam, making a separate manual save and attention to unused cash sensible. Do not confuse a mission-replay function with reloading an older save; the guide reports no conventional replay list and no mission gold medals.

    Sources, verification and spoiler policy

    PC Gamer, Sean Martin and Christopher Livingston: five chapters and 91 named/undisclosed mission slots (Nov 18, 2026) · PowerPyx: main and optional mission index, marker behavior, missables and replay policy (Nov 18). The Leonida Scene independently organizes these factual titles and provides its own troubleshooting and editorial links; it does not copy the source’s story summaries or claim to have played all 91 missions. Updated as new missions are independently checked.

  • GTA 6 Unwanted Attention Walkthrough: Phoenix Car and Police Scanner

    GTA 6 Unwanted Attention Walkthrough: Phoenix Car and Police Scanner

    November 19 troubleshooting: disguise step won’t complete or garage door stays shut

    What should normally happen: Near the end of Unwanted Attention, the game teaches recognition reduction after you return the Phoenix. Open the loadout with L1/LB, move to the Items tab using R1/RB, then select the hat and glasses icons using X/A. The prompts let you adjust or remove the recognized accessories. Do this when the garage objective appears, then check whether the objective completes before leaving. This input sequence is described in the GamesRadar walkthrough and GTA BOOM.

    If the hat and glasses step does not register

    1. Make sure you have completed the marked Phoenix delivery and collected the office payment; confirm the objective is actually telling you to adjust recognition.
    2. Use the Items tab, not the clothes store or a controller mapping unrelated to headwear. Try using each item icon and check the Take Off option separately, rather than repeatedly changing the same accessory.
    3. Pause and check whether the mission objective changes. A closed garage door can be a symptom of the disguise objective still being active, not necessarily a broken vehicle door.
    4. Community replies suggest removing both the hat and glasses, or trying a different complete outfit, but neither has been independently confirmed as a universal fix. Try these only if the normal prompts fail.
    5. If the game is genuinely frozen, preserve the latest manual and autosave slots. Restart the checkpoint or reload a known-good earlier save only after checking the timestamps. Do not delete all saved data.

    Evidence status: Several separate November 19 players reported the garage/hat objective remaining stuck even after a checkpoint restart, including this report and this report. Rockstar has not provided a verified permanent patch for this precise symptom. Record the console, version, active text prompt and whether an earlier checkpoint works before filing a support ticket.

    Unwanted Attention — faster answers for stuck players

    Can’t find the red Phoenix? Look inside the police impound lot after crossing the reported climbable fence/container route. The car is associated with a tow vehicle. The walkthrough’s core instruction is to access the Phoenix rather than search nearby public parking for a random red car.

    Why is police heat still visible after escaping? GTA VI distinguishes escaping the immediate police chase from clearing identification or heat. This mission teaches respraying the recovered vehicle and changing appearance; following the quest markers at the body shop and clothes/hat tutorial is separate from simply losing line of sight.

    Where is the police scanner? Cal installs it on Jason’s phone during the early mission. It is not a separately purchased GTA Online feature. PC Gamer lists Unwanted Attention sixth in Chapter 1; see the complete story list. Sources: VGC and PowerPyx, November 18.

    Quick answer: Unwanted Attention (Go See Cal) is an early GTA VI mission that sends Jason and Cal to a police impound lot in Hamlet to recover a red Imponte Phoenix. Two published launch-day walkthroughs agree that the mission unlocks a police radio scanner on Jason’s phone and teaches how the game’s wanted/heat system recognizes cars and clothing. The final car drop-off includes a reported $150 reward.

    Mission at a glance

    DetailReported from launch-day guides
    Quest giverCal
    Chapter / characterEarly Chapter 1, Jason
    Start regionKey Lento, Mariana County
    ObjectiveRecover Phoenix from Hamlet impound and deliver it
    Notable unlockPolice-scanner app
    Reward reported by PowerPyx$150 at drop-off
    Mission facts cross-checked between PowerPyx and VGC, November 18, 2026.

    1. Meet Cal and drive to the impound

    Find Cal at his marked meeting location in or near Key Lento; PowerPyx places him near the northern beach, while VGC describes him fishing near a bridge. Follow the active quest marker, enter Cal’s vehicle and drive toward Hamlet. During the journey he installs the police-scanner app, which explains later dispatch audio. You do not need to look for an app-store download or paid add-on.

    2. Get into the impound and locate the Phoenix

    Approach the impound perimeter and look for the climbable gap toward the left of the lot. PowerPyx describes getting over one fence and additional containers to reach the inner impound. The targeted red Phoenix is parked on or attached to a tow vehicle. VGC confirms that you can use the phone’s scanner to identify cars.

    Follow the tow vehicle’s on-screen control to release the car, then get into the Phoenix and drive toward the exit. Guards are in the area. Knockouts or prolonged delay may trigger a police response; avoid presenting this as a guaranteed no-alarm stealth route.

    3. Lose the police without wrecking the car

    The mission deliberately creates a chase. Get clear of immediate line of sight, use turns and distance to escape the search area, and keep the vehicle driveable. VGC notes that excessive car damage can fail the mission. The residual heat/recognition display is distinct from the active wanted chase.

    4. Repair, deliver and adjust your appearance

    • When the pursuit ends, follow the marker to the Pay ‘n’ Spray in Hamlet and respray the Phoenix.
    • Drive to Brian’s designated garage and park in the marked location.
    • Collect the reported $150 from the appropriate garage area.
    • Follow the tutorial to adjust your hat/glasses and examine recognition indicators.
    • Purchase an outfit at the indicated shop to complete the mission’s appearance-change lesson.

    Why the police scanner matters

    Kotaku’s reviewer confirms that Cal’s phone program provides an in-world explanation for hearing police radio reports. The app helps the protagonists learn what officers know about their car or clothing; it does not by itself make them invisible. Learn more from our wanted/heat guide and phone-app index.

    Sources, scope and spoilers

    PowerPyx Unwanted Attention walkthrough and VGC mission guide, both November 18. This guide explains objectives but avoids describing story cutscenes or character revelations. Control prompts and mission order should be checked on your own version.

  • Can You Skip GTA 6 Missions After Failing? What Reviewers Confirm

    Can You Skip GTA 6 Missions After Failing? What Reviewers Confirm

    Quick answer: A November 18 firsthand review of Grand Theft Auto VI by The Verge says that its checkpoint system cuts down on replaying completed sections and that players can skip a mission after failing repeatedly. The reviewer did not publish an exact failure threshold, the appearance of the option or what skipping changes about rewards and completion.

    Mission failure: what the review does and doesn’t establish

    Reviewer-confirmedNot verified
    Shorter replays through improved checkpointsExact checkpoint locations in every mission
    A mission-skip option after repeated failuresFixed number of failures or button sequence
    A less repetitive retry experienceTrophy, payout or 100% completion consequences
    From The Verge’s firsthand GTA VI review. Individual mission behavior may vary.

    What has actually been verified?

    The observed difference is between restarting from a more recent checkpoint and a separate mission-skip possibility after repeated failure. Those are not interchangeable. The Verge reports both while discussing the campaign’s multi-stage heists and action missions.

    The report does not establish that every mission can be skipped or that the feature is available immediately. It also does not disclose a universal three-failure rule, controller shortcut or a menu path. Any guide claiming such a rule needs direct footage of the specific build and mission.

    What should you try if a mission keeps failing?

    • Use the on-screen restart/checkpoint prompt rather than quitting the game or deleting save data.
    • Read any new failure or retry options that appear; their wording may vary by mission.
    • If a skip option becomes available, consider whether you want to experience the mission’s objectives and story before selecting it.
    • Record the mission name, console, version and exact on-screen wording if you want to report a reproducible method.

    Does skipping affect completion or trophies?

    Unknown from the published review. We have not established whether a skipped mission counts identically toward story completion, trophies, challenge ratings or replay menus. Players seeking 100% completion should avoid treating an unverified skip as risk-free until a source shows how the save and mission logs behave.

    Our 100% completion guide distinguishes confirmed requirements from open questions. For the campaign opening, see the spoiler-light prologue walkthrough.

    How GTA VI compares with GTA V

    The original GTA V also offered assistance after failure, but a direct one-to-one comparison of skip eligibility and consequences requires the same type of tested conditions. The important reported change here is a more streamlined checkpoint experience and the availability described in a current GTA VI review, not a claim that Rockstar invented mission skipping.

    Source and verification

    Source: The Verge’s GTA VI review, November 18, 2026. Evidence: firsthand published review; no independent controller-level retail test by The Leonida Scene. Last checked November 18, 2026.

  • GTA 6 First Mission Walkthrough: Prologue and What Comes Next

    GTA 6 First Mission Walkthrough: Prologue and What Comes Next

    GTA VI Prologue is mission 1 of the 91-story index — what comes next?

    PC Gamer’s November 18 five-chapter index places the Prologue first, followed by Gone Fishing, where Jason and Cal begin a boat-based pickup and rescue mission. Our Gone Fishing walkthrough covers the boat controls, camp stealth, optional money pickup and seaplane escape. This is the intended next objective-level help without spoiling Lucia’s opening character revelation.

    Check the 91-mission directory for all five chapters. PC Gamer’s count includes 22 Chapter 1 entries, but PowerPyx numbers optional/tutorial tasks differently, so the number printed on an individual walkthrough may not always match a separate website.

    Source: PC Gamer’s November 18 list and PowerPyx’s Gone Fishing objectives. Our original Prologue walkthrough and its spoiler guard remain below.

    Spoiler-light walkthrough: GTA VI begins with a playable Prologue at Hamlet Prison. If you are stuck in the opening minutes, this guide explains the controls and objective order without revealing the most important personal twist in Lucia’s story. The first mission introduces interactions, escorted movement, a short robbery sequence and how to read police-search indicators. PowerPyx’s November 18 firsthand mission breakdown provides the detailed mission sequence. Afterward, the game’s first Chapter 1 mission is Gone Fishing, which introduces Jason, boats and a more open-ended combat encounter.

    Before you start: spoilers and navigation

    This article contains basic objective and gameplay spoilers for the first mission, but avoids summarizing the opening’s major character revelation. It is written for players who want to make progress without learning the final dialogue in advance. The details below are attributed to a release-period walkthrough; The Leonida Scene has not independently completed this mission on a retail console.

    Mission 1: Prologue at Hamlet Prison

    • Interact with the cellmates: when Lucia can move, look toward other people in the room. Use the game’s targeting or inspect prompt to focus on them, then the displayed conversation button to speak. This establishes that some NPC conversations are contextual rather than always available from a normal phone menu.
    • Follow the guard: when the guard opens the route, stay with the escort and wait while the path briefly pauses. This is a directed introduction, so running ahead or searching for another exit does not advance it faster.
    • Complete the flashback interaction: after the counselor sequence transitions into a playable memory, use the on-screen prompt to intimidate the store employee and collect the money. The scene may include a button-response sequence, so watch the prompt rather than repeatedly pressing one attack button.
    • Follow the police-search tutorial: the minimap highlights the active police search area; this first chase is primarily a scripted demonstration of wanted-level behavior. It is not an ordinary open-world escape that you must optimize for a perfect getaway.
    • Return to the indicated destination: after the next scripted transition, follow the minimap pin/compass toward the designated objective and let the resulting scene conclude. The character story then moves into Chapter 1.

    What if the prison guard stops walking?

    The published mission steps mention a brief pause during the escort. If the guard appears to be waiting, check whether a phone conversation or dialogue is playing and follow once movement resumes. Do not reload the whole game instantly. If the objective marker remains unchanged for an unusually long time, check that your controller inputs work, note the precise mission state, and use our technical troubleshooting guide for safe restart methods. We have not confirmed a widespread “frozen prison guard” launch bug.

    Why can’t I lose the police during the opening robbery?

    PowerPyx’s walkthrough notes that the prologue’s chase leads into a fixed narrative sequence. The search-area indicator teaches the interface, but the scene isn’t judged like an ordinary later free-roam pursuit. If you keep looping around streets and expect a normal “wanted level cleared” message, you may be fighting the tutorial rather than following its script. Pay attention to the next marker or scripted scene, and avoid assuming failure to permanently escape is a technical defect.

    What happens after the prologue?

    Gone Fishing begins Chapter 1 as Jason, and its starting area is Mariana County according to PowerPyx’s first chapter walkthrough. It changes the gameplay rhythm: first you pilot a boat and follow a plane, then you use binoculars to observe an area before a rescue and escape. Those are broad objective categories, not a complete revealing walkthrough of its plot. If you just want to keep playing, follow the in-game pink mission line and character prompts.

    Five first-hour settings worth checking

    • Save-file awareness: the published trophy guide reports 15 manual save slots and one autosave; see our save and cheat guide once normal free roam is available.
    • Subtitle readability: look for text and audio accessibility options before longer character exchanges, especially if you are avoiding rereading spoilers online.
    • Mission markers: according to the PowerPyx mission index, major story quests use a pink icon with dark lettering; optional mission icons reverse that emphasis.
    • Controller prompts: use the buttons presented in your own PS5 or Xbox game rather than trusting controller instructions copied for a different platform.
    • Spoiler safety: avoid searching for mission-ending dialogue. Use this minimal objective list and our spoiler-control guide if you need help without a major reveal.

    What this walkthrough does not claim

    It does not assert a universal completion time, a hidden gold-medal requirement or an optional shortcut through Hamlet Prison. The published full walkthrough reports no mission gold medals or mission replay, and recommends preserving multiple manual save points. It also does not treat a normal scripted opening chase as evidence of a bug. If Rockstar changes controls or the mission is patched, later evidence should supersede the November 18 reviewer build.

    Firsthand sources and update status

    Source review November 18, 2026. The guide summarizes reported gameplay interactions in original terms without recreating another outlet’s complete walkthrough. Story-reveal details intentionally omitted; no direct independent console test, FPS timing or mission bug reproduction is claimed.

  • GTA 6 Mission Freedom: Alternative Routes and Different Ways to Complete Missions

    GTA 6 Mission Freedom: Alternative Routes and Different Ways to Complete Missions

    November 20 speedrun and route-skipping claims: verification threshold

    Research watchlist, not proven routes: A November 19 player community collection includes clips purporting to show wall clipping, vehicle-launch physics and possibly bypassing a pursuit segment. A clip alone is not evidence of a stable mission skip. Before recommending such a route we require an uncut attempt, mission name, location, button sequence, game build, console and an independent successful reproduction.

    Do not confuse visual tricks with genuine mission skips: GTA VI has a Reduced Vehicle Damage setting that can change how collision videos look. A spectacular crash with minimal damage is not proof of an invincibility cheat. Likewise, some missions permit legitimate route choices even if an out-of-bounds video is unreliable.

    Reliable alternative: If a mission is blocking progress, start with officially observed retry/skip behavior and our mission hub. Players experimenting with glitches should preserve a clean manual save. Evidence: unverified community discovery leads as of November 20; do not publish fixed routes from them until tested.

    Now that mission walkthroughs exist: verified routes vs broader design claims

    Rockstar’s discussion of alternative escape paths does not imply every GTA VI story mission offers multiple full-length solutions. The Leonida Scene now maintains a source-checked 91-story mission directory with individual guides linked only when independently supported.

    Examples of documented optional approaches: Gone Fishing allows a stealth-heavy camp approach and an optional cash detour; Hey Arnold! ends with an explicit player choice; Island Dreams includes a shark rescue that may change immediate dialogue. These are separately sourced gameplay observations, not proof of different campaign endings.

    Source trail: PowerPyx Gone Fishing and PowerPyx Island Dreams.

    Quick answer: Rockstar has confirmed that some GTA VI missions allow multiple approaches and alternate escape routes rather than requiring one exact path. Other sequences remain guided for narrative reasons. The developer describes a tower-block escape with several exits and a pursuit where the recommended route is not the only way out. This is a guide to the mission design, not a walkthrough of an unverified mission.

    Where missions give players more choice

    Previewed situationWhat Rockstar described
    Escaping a tower blockSeveral routes out of the building.
    A getaway with RaulThe opening sequence is guided, then the player can take control of the vehicle and choose another viable escape route.
    A robberySome targets can be approached with different methods and one or both protagonists.
    Story-specific scenesThe narrative can require a particular sequence or character.

    In IGN’s October 7 developer interview, Rob Nelson explains that the team sought to expand player choice when it did not compromise the story. GamesRadar’s analysis highlights the same distinction.

    Can you ignore the suggested route?

    In the developer’s pursuit example, yes: the mission can still continue if the player takes an alternative path. That does not establish that leaving a designated area or ignoring every waypoint is safe. A route can be optional while an objective, destination or story checkpoint remains mandatory.

    How the new systems affect mission approaches

    Rockstar aims for police pursuit and robbery systems to behave consistently between the story and open world where possible. A different approach might change the immediate police response, the route available or the value of loot. Read the police Heat guide, robbery approaches and character switching for the separate mechanics.

    Does every mission support stealth or a nonlethal solution?

    No universal rule has been established. Rockstar has described nonlethal combat choices, but a story objective can still require a specific action. A flexible escape route is not proof that the whole mission can be completed without combat. We also have no verified mission-replay menu, medal checklist or branching mission chart.

    How our walkthroughs will distinguish required and optional steps

    • Identify the exact objective and mandatory destination.
    • Show the route that has actually been completed, including checkpoints or restrictions.
    • Identify a second approach only when footage or documented play verifies it.
    • Record any different loot, police response or failure conditions instead of assuming that every approach gives the same reward.

    Explore our Missions & Walkthroughs hub for launch preparation. Exact mission names, step-by-step routes and rewards will be added when the released game provides sufficient evidence.

    Sources and review date

    Reviewed November 13, 2026. The Leonida Scene is an independent, unofficial player resource. Pre-release demonstrations and general console documentation are distinguished from retail GTA VI testing.