Category: Missions & Walkthroughs

Mission help and step-by-step walkthroughs based on verified gameplay, with spoiler controls where relevant.

  • GTA 6 Afternoon Delight: Should You Help Frankie and Mario or Refuse?

    GTA 6 Afternoon Delight: Should You Help Frankie and Mario or Refuse?

    Spoiler warning — Chapter 2: Afternoon Delight. Quick answer: Both Help and Don’t Help ultimately lead into the robbery at Delights. Helping Frankie and Mario changes the entertainment scene, while refusing produces a shorter, different lead-in before Jason announces the hold-up. If your aim is to see the most unusual optional sequence, PC Gamer recommends helping; there is no evidence that you must accept to complete the mission.

    When do you make the choice?

    The decision happens in the Chapter 2 mission Afternoon Delight, as Jason and Lucia prepare to help Vicki rob her boss Frankie’s Delights nightclub in Port Gellhorn. Jason comes through a backstage area during the club’s ladies’ night, where a performer is unavailable. Frankie and Mario ask whether Jason can dance. The dialog decision appears briefly; save beforehand if you want to compare the branches.

    What happens if you choose Help?

    Jason steps in as a substitute performer in a comic stage sequence. The scene includes dancing and a reaction from Lucia, after which the planned robbery still takes place. Players interested in the mission’s unusual character interaction will get more of that content through this choice. The exact staging is intentionally not spoiled here beyond the basic premise.

    What happens if you choose Don’t Help?

    Mario leaves and the scheduled act is abandoned. Frankie makes an awkward attempt to perform himself, and Jason interrupts to announce the robbery. This path is different and tends to reach the robbery more directly, but it does not cancel the job or bypass the story mission.

    Decision comparison

    ChoiceChanges in sceneRobbery outcome
    HelpJason performs during ladies’ nightRobbery proceeds
    Don’t HelpFrankie performs briefly before interruptionRobbery proceeds

    Does this choice change rewards or unlocks?

    The published PC Gamer walkthrough confirms the two scene variations and the robbery proceeding. It does not provide evidence of different permanent cash payouts, a changed mission unlock or an alternate ending based solely on this one reply. Do not use an unverified reward chart to make the decision.

    Can I see the other version later?

    If you want both variations, the safest approach is to make a separate clean manual save before the interaction, provided saving is available in your current progression state. GTA VI does not provide a conventional guaranteed replay option for every mission. Check how manual saves work and our mission directory.

    FAQ: will I fail the mission if I refuse?

    Not according to the source playthrough. Refusing changes the scene, but the robbery sequence remains available.

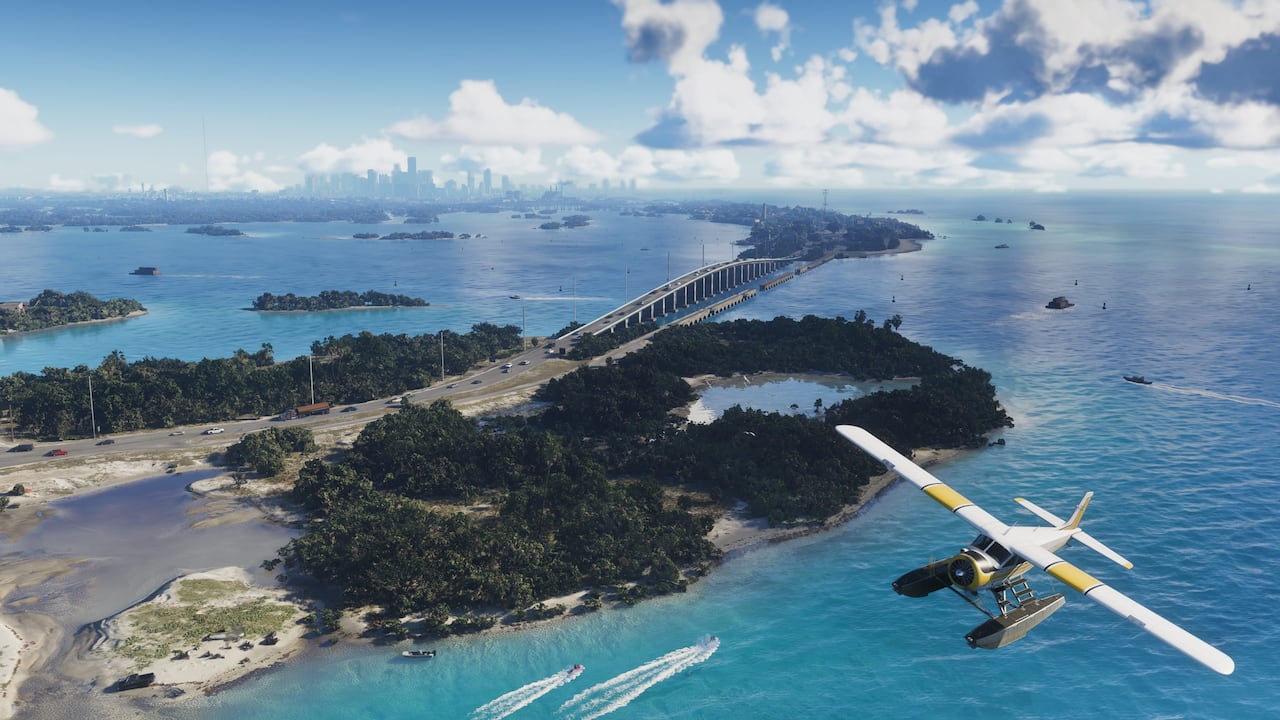
    Source: PC Gamer’s November 19, 2026 mission choice walkthrough. Our article focuses on differences that were actually observed, not speculative relationship or morality effects. Featured artwork is illustrative rather than a frame of this mission.

  • GTA 6 Dubious Provenance Choice: Give Benedict Halifax the Statue or Keep It?

    GTA 6 Dubious Provenance Choice: Give Benedict Halifax the Statue or Keep It?

    Spoiler warning: Chapter 3, mission Dubious Provenance. Short answer: Handing the bronze statue to art dealer Benedict Halifax is the faster choice if you intend to finish the mission. Refusing at first does not create a permanently separate storyline; you can hold onto it, but you eventually have to return and hand it over to continue. PC Gamer’s playthrough found no significant lasting branch from this initial refusal.

    When does the Halifax choice appear?

    The relevant objective occurs in Dubious Provenance, described as the fourth Chapter 3 story mission in PC Gamer’s ordering. After Cal visits the Bayside apartment borrowed from Boobie and inspects the hard drive, a statuette icon appears at the closet. Jason and Lucia obtained the bronze object earlier in Chapter 1. Inspect it to start the errand, then drive to Capri and visit the antiques business.

    What happens if you give Halifax the statue?

    1. At the Capri antiques shop, Evelyn Andrews refuses to buy the apparently stolen artwork.
    2. Dealer Benedict Halifax approaches and offers to evaluate it. Agree to hand it over.
    3. Halifax gives you a watch as collateral during the supposed appraisal.
    4. He later becomes difficult to reach, and you must follow up with calls to track him down and resolve the errand.

    What happens if you keep the statue instead?

    Declining lets you retain it temporarily, but the story’s objective does not turn into a separate confirmed long-term reward. According to PC Gamer’s test, the player must return to Capri later and give Halifax the statue to continue that mission path. The practical cost of refusing is extra travel and time rather than escaping the dealer’s storyline.

    Best choice by goal

    Your goalSuggested choice
    Finish the story mission with least backtrackingGive Halifax the statue now
    Role-play a cautious characterKeep it temporarily, accepting another return trip
    Keep a permanent unique collectibleNo verified alternate keep-forever completion path

    Will it change the ending or your Criminal Profile?

    The tested source does not document a distinct ending, permanent dealer replacement, extra cash outcome or profile-rank change from this first decision. Do not interpret the absence of an observed branch as proof that no other dialogue changes are possible; it simply means those effects have not been verified. For the difference between temporary decisions and the broader system, see GTA VI Criminal Profile.

    What if Dubious Provenance won’t start?

    Confirm you reached the relevant Chapter 3 Bayside apartment sequence with Cal, and look for the statuette interaction at the closet. If there is no marker, check story progress and current mission availability before assuming a bug. Use a manual save before major story events; see saving precautions.

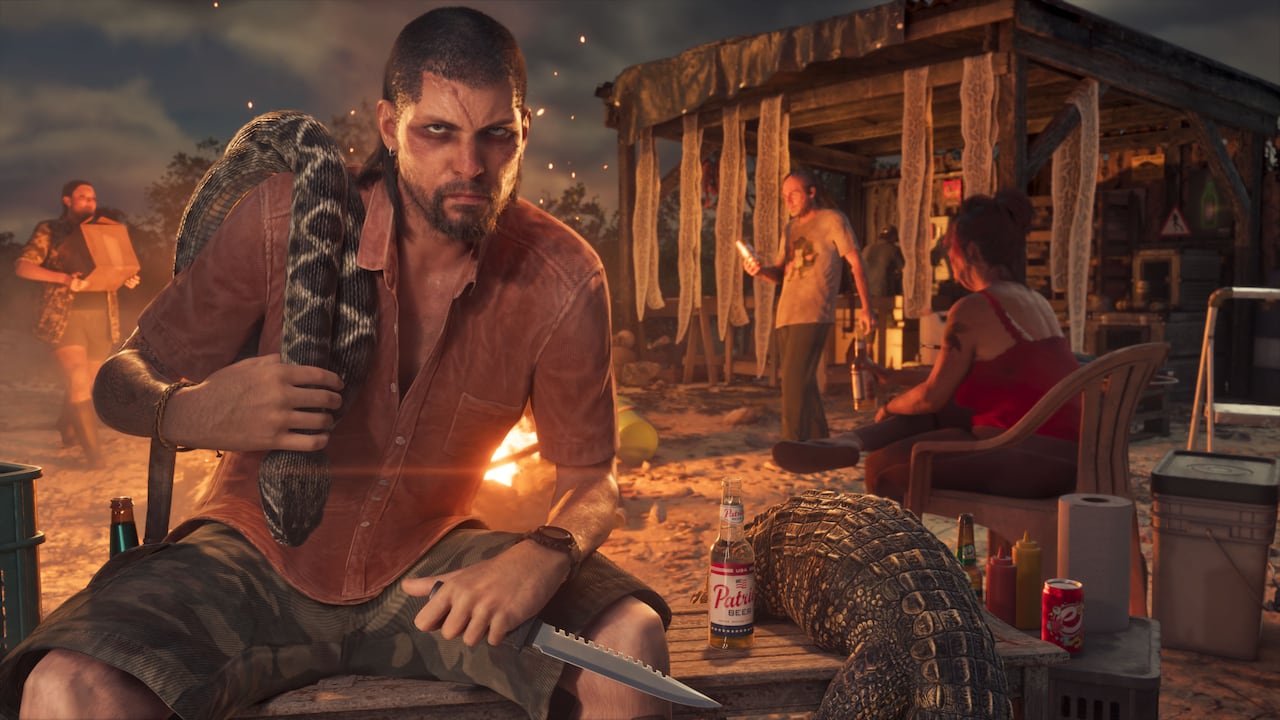
    Source: PC Gamer hands-on choice guide, published November 19, 2026. This is independently written synthesis, not The Leonida Scene firsthand gameplay. The featured image is not a mission-specific screenshot.

  • GTA 6 Swamped Walkthrough: Kingfisher Camp, Helicopter Chase and Lori Rescue

    GTA 6 Swamped Walkthrough: Kingfisher Camp, Helicopter Chase and Lori Rescue

    Quick answer: Travel with Brian to the Kingfisher camp, survive the escape, and rescue Lori. During the aerial pursuit, prioritize the kidnapper without hitting Lori: she can be killed by accident and the mission will fail.

    Mission spoilers: This guide discusses playable objectives, failure conditions and optional rewards, but avoids major story-cutscene revelations. The Leonida Scene has synthesized published first-hand walkthrough reporting rather than claiming to have recorded this gameplay.

    Objective-by-objective walkthrough

    StepWhat to do
    1. Start with Brian at the barSpeak with Brian and enter his truck. Follow the journey to the Kingfisher camp and the marked conversation area. The mission then shifts into a dangerous escape; the exact cutscene trigger is intentionally not described in detail.
    2. Fight your way toward LoriA large number of hostile gang members appear. VGC says eliminating every opponent is unnecessary for objective progress, but the crowd can make a clean run difficult. Move between cover and don’t expose yourself in open ground.
    3. Board the helicopterAt the camp edge, climb into the helicopter with Brian and follow Lori’s captors. You’ll be able to shoot at enemies during the chase and the game identifies a truck target.
    4. Keep Lori out of your line of fireShoot carefully when directed at the kidnappers. An accidental hit on Lori is a recorded mission failure; don’t fire indiscriminately into the vehicle or target area.
    5. Handle the fan-boat fallbackIf the kidnappers escape the initial helicopter confrontation they may move onto a fan boat. VGC describes two routes: close in with another boat to board, or shoot the driver while keeping Lori safe.
    6. End the rescueOnce the captor is neutralized and Lori is safe, the mission advances. Avoid guessing an undocumented reward or alternative ending.

    Common failures and frequently asked questions

    Can I clear the Kingfisher camp without killing everyone?

    The published walkthrough says not every gang member is required, although many may need to be fought to reach the escape.

    Why did Swamped fail in the helicopter?

    The captors escaping with Lori or accidentally shooting Lori are the documented fail conditions.

    What happens if the kidnappers reach the fan boat?

    You can pursue in another fan boat and board once close enough, or neutralize the driver carefully.

    Do I need to destroy the entire truck?

    Follow the displayed game prompt, but check Lori’s position before firing. Protecting the hostage takes priority over indiscriminate damage.

    Missables and optional discoveries

    • This article contains objective-level spoilers but omits the major event that triggers the camp escape.
    • Use deliberate shots in the helicopter and water chase.
    • Existing Grassrivers artwork is illustrative location art, not a screenshot of Lori or the hostage rescue.

    Related guides and chapter order

    Part of our 91-story-mission directory. Clear Skies · Police and combat. Depending on protagonist availability, some missions can be played in a different order than the published story recap.

    Sources and visual authenticity

    Primary mission reporting: VGC mission walkthrough, November 18, 2026. Existing featured media is original promotional or location artwork for context—not a captured frame from this particular mission. Controls can vary with accessibility settings; follow the prompt shown on your console.

  • GTA 6 Day Release Walkthrough: Free Dress, Jet-Ski Choice and Yacht Secrets

    GTA 6 Day Release Walkthrough: Free Dress, Jet-Ski Choice and Yacht Secrets

    Quick answer: Day Release changes control to Lucia, then moves through the yacht, jet-ski activities, an outfit choice, a Vice City driving segment and a club sequence. Select a dress you like: VGC says the chosen outfit is permanently unlocked, while other options can be bought later.

    Mission spoilers: This guide discusses playable objectives, failure conditions and optional rewards, but avoids major story-cutscene revelations. The Leonida Scene has synthesized published first-hand walkthrough reporting rather than claiming to have recorded this gameplay.

    Objective-by-objective walkthrough

    StepWhat to do
    1. Meet Lucia and head to the yachtGo to the bar, finish the opening objective and switch into Lucia’s playable segment. Board the speedboat and follow the route to Mattia’s yacht.
    2. Choose how to ride the jet skiYou can reportedly ride alone or take Jason along. Choosing to accompany Jason gives a relationship benefit according to VGC. Follow the course and ramps, then return for Mattia’s informal challenge.
    3. Complete the focus activityUse Focus Mode for the champagne-bottle shooting interaction. The number you hit affects a brief line of dialogue but the source does not identify a mission-blocking failure for missing the bottles.
    4. Choose a dress for LuciaVisit the yacht bedroom and select the dress you want unlocked at no charge. VGC reports the other dresses remain available for purchase later; you don’t permanently lose them.
    5. Inspect optional yacht detailsOn the lower deck, you can reportedly photograph documents and capture a photo at the bow with Jason to gain another relationship response. These are optional interactions rather than all being forced mission gates.
    6. Follow Mattia in Vice CityDrive through the city following the route and avoid wrecking the supercar. A later visual filter makes the road harder to see; destroying the car is the documented failure condition.
    7. Complete the club activitiesFollow Mattia, remain in the relevant VIP area, and dance with Jason when prompted. VGC reports L2 flourishes can improve relationship standing. Follow the final marked exit.

    Common failures and frequently asked questions

    Which dress should I pick?

    The one you most want available right now: it becomes permanently yours, but the others can be purchased later.

    Is riding with Jason better?

    The source reports a relationship increase if Lucia chooses to ride with him. It does not establish a guaranteed endgame result.

    Can I fail the champagne-shooting section?

    The VGC walkthrough says missing bottles changes dialogue, rather than blocking progress.

    Why is the second supercar drive blurry?

    The guide describes a scripted visual filter during that scene. Avoid destroying the car, and distinguish this story effect from a persistent graphics setting issue.

    Missables and optional discoveries

    • Spoiler warning: the outfit and dialogue choices are revealed, but later plot scenes are not fully described.
    • Check the lower decks and yacht bow if you want the optional photo interactions.
    • A relationship boost from a specific action should not be misrepresented as a guaranteed ending.

    Related guides and chapter order

    Part of our 91-story-mission directory. Relationship guide · Clothing guide. Depending on protagonist availability, some missions can be played in a different order than the published story recap.

    Sources and visual authenticity

    Primary mission reporting: VGC mission walkthrough, November 18, 2026. Existing featured media is original promotional or location artwork for context—not a captured frame from this particular mission. Controls can vary with accessibility settings; follow the prompt shown on your console.

  • GTA 6 Clear Skies Walkthrough: Escort Pilot Pete, Rescue Donnie and Escape

    GTA 6 Clear Skies Walkthrough: Escort Pilot Pete, Rescue Donnie and Escape

    Quick answer: Start with Donnie and Brian, escort Pilot Pete in the aircraft, land at the airstrip and survive the failed deal. Donnie’s rescue has a genuine fail condition if attackers reach him; the final escape leads to a small home interaction.

    Mission spoilers: This guide discusses playable objectives, failure conditions and optional rewards, but avoids major story-cutscene revelations. The Leonida Scene has synthesized published first-hand walkthrough reporting rather than claiming to have recorded this gameplay.

    Objective-by-objective walkthrough

    StepWhat to do
    1. Speak with Donnie and BrianBegin at Donnie’s mission prompt, then visit Brian at the bar as directed. Return to Donnie’s plane, taxi it into the river and take off toward the aerial intercept point.
    2. Catch and escort Pilot PeteMatch Pete’s low flight path and accompany him to the first marked runway. Follow the route to the next airstrip. Don’t rush the landing: destroying the aircraft fails this section.
    3. Enter the deal locationTaxi and follow Donnie to the meeting. The encounter deteriorates, after which multiple Final Chapter enemies attack from positions around the airstrip buildings. Stay behind cover and be prepared for flanking.
    4. Locate and protect DonnieAdvance through the hangars and buildings. When you reach Donnie, prioritize enemies directly threatening him; VGC says Donnie being killed causes mission failure. Clear a path before moving away.
    5. Escape the airstripWhen Donnie gets away by plane, find a bike and retreat down the indicated route, managing any pursuers. Rejoin him near the riverbank to finish the escape.
    6. Complete the home interactionAfter the return scene, follow the prompt to help Lucia assemble the coffee table. This uses a short quick-time-event sequence and closes the mission.

    Common failures and frequently asked questions

    What causes Clear Skies to fail?

    A destroyed aircraft on landing or Donnie being killed during the rescue are documented fail states.

    Where is Donnie held?

    Inside the airstrip hangar/building complex after the deal breaks down. Follow the left-hand breach route and clear nearby enemies.

    Do I have to defeat every pursuer before escaping?

    The published route emphasizes reaching the bike and fleeing while fighting off threats; don’t confuse enemies still visible with an unfinished rescue objective.

    Why does the mission continue after the chase?

    The home coffee-table interaction is part of the same playable mission, rather than an unrelated side job.

    Missables and optional discoveries

    • Stay aware of enemies flanking around the side of cover.
    • Keep your landing under control; the mission can fail before you reach combat.
    • The source identifies these segments without requiring major cutscene spoilers.

    Related guides and chapter order

    Part of our 91-story-mission directory. Down to Earth · Combat and Focus Mode. Depending on protagonist availability, some missions can be played in a different order than the published story recap.

    Sources and visual authenticity

    Primary mission reporting: VGC mission walkthrough, November 18, 2026. Existing featured media is original promotional or location artwork for context—not a captured frame from this particular mission. Controls can vary with accessibility settings; follow the prompt shown on your console.

  • GTA 6 Down to Earth Walkthrough: Plane Landings, Boat Cleaning and Parole Officer

    GTA 6 Down to Earth Walkthrough: Plane Landings, Boat Cleaning and Parole Officer

    Quick answer: Meet Brian at the marina, wash the boat, complete the seaplane collection route and bring the cargo home. A hard water landing can destroy the plane and fail the mission; the final task is hiding the cargo before the parole-officer conversation.

    Mission spoilers: This guide discusses playable objectives, failure conditions and optional rewards, but avoids major story-cutscene revelations. The Leonida Scene has synthesized published first-hand walkthrough reporting rather than claiming to have recorded this gameplay.

    Objective-by-objective walkthrough

    StepWhat to do
    1. Clean the boat at Brian’s marinaFollow Brian to the marina and use the power washer on his boat. VGC reports that R2/R1 controls the pressure-washing interaction depending on the displayed control prompt. Check around the boat for remaining grime if the objective does not advance.
    2. Fly with Lucia to Bobcat BayBoard the plane together and navigate to the marked boat. Land on the water, collect the package, and handle the hostile encounter that interrupts the transfer. This is not a scenic flight-only mission.
    3. Make the next water landing carefullyAs you approach the next delivery, reduce speed and descend smoothly. VGC recommends making substantial use of L2 near the water to avoid striking the surface too hard. Even a landing a little short can be salvaged by taxiing the aircraft on the water.
    4. Finish the flight routeContinue through the marked drop points, including a segment that requires flying alongside a boat. Follow the navigation cues back to Brian’s dock and land without destroying the aircraft.
    5. Hide the cargo and speak with the parole officerAfter returning home, put the cargo in the washing machine in the shed, then use Lucia to complete the required parole-officer interaction. The order matters: the cargo concealment is part of the objective sequence.

    Common failures and frequently asked questions

    Why does the seaplane explode when landing?

    VGC identifies a hard impact with the water as a mission failure. Approach slower, level the aircraft and use the on-screen landing controls; don’t descend at a steep angle.

    Do I need a perfect landing at each boat?

    No. The walkthrough says you can taxi a short distance over the water after a slightly short touchdown.

    Where do I hide the cargo?

    In the washing machine in the shed at the home, before meeting the parole officer.

    What if the boat-cleaning objective seems stuck?

    Continue washing the remaining visible dirt on Brian’s boat until the objective changes; no special alternate tool is reported.

    Missables and optional discoveries

    • Carry healing supplies for the Bobcat Bay hostility; a peaceful transaction is not guaranteed.
    • The seaplane is the key failure risk here, not the precise spot of a soft water touchdown.
    • The featured promotional image is regional artwork, not a direct recording of these flight controls.

    Related guides and chapter order

    Part of our 91-story-mission directory. Boats and water travel · Aircraft and flying. Depending on protagonist availability, some missions can be played in a different order than the published story recap.

    Sources and visual authenticity

    Primary mission reporting: VGC mission walkthrough, November 18, 2026. Existing featured media is original promotional or location artwork for context—not a captured frame from this particular mission. Controls can vary with accessibility settings; follow the prompt shown on your console.

  • GTA 6 Clean Up After Donnie Walkthrough: Missing Package, Shack and Buyer Unlock

    GTA 6 Clean Up After Donnie Walkthrough: Missing Package, Shack and Buyer Unlock

    Quick answer: Follow the riverbank marker, inspect Donnie’s missing package, take the fan boat to the Kingfishers’ shack, secure the package and return it to the toolbox behind Donnie’s trailer. The mission unlocks Donnie as a narcotics buyer.

    Mission spoilers: This guide discusses playable objectives, failure conditions and optional rewards, but avoids major story-cutscene revelations. The Leonida Scene has synthesized published first-hand walkthrough reporting rather than claiming to have recorded this gameplay.

    Objective-by-objective walkthrough

    StepWhat to do
    1. Investigate the missing packageGo to Donnie’s marked pickup point by the river. The item is not where it should be: inspect the empty wrapping at the edge of the water before leaving. This is the clue that advances the pursuit.
    2. Go downstream to the shackUse the indicated fan boat to follow the river. At the shack, Kingfisher gang members can initially speak with you but will become hostile. Stay aware that the boat offers little cover; eliminate the immediate threat before advancing if your health is dropping.
    3. Recover the packageEnter the shack after the encounter to collect the package. VGC also reports a sniper rifle in the building. It can be useful when additional enemies arrive by boat.
    4. Call Donnie and complete the handoffAfter defending yourself on the return leg, call Donnie. Follow his instruction to place the recovered cargo in the old toolbox behind his trailer. This is a drop-off rather than an immediate in-person sale.

    Common failures and frequently asked questions

    Where is the missing package?

    At first, the package is gone from the riverbank. Inspect the empty container there, then follow the river to the Kingfishers’ shack for the actual cargo.

    Where is Donnie’s drop box?

    VGC places it in his old toolbox behind the trailer. Do not mistake the front door for the deposit location.

    Do I need to avoid all combat?

    No. The walkthrough describes a scripted hostile encounter near the shack; plan for a firefight.

    What does the mission unlock?

    Donnie becomes a buyer for narcotics. Subsequent locations of additional packages may arrive through messages.

    Missables and optional discoveries

    • Your own boat can be a poor place to absorb gunfire; find safe angles where possible.
    • Check the shack for the reported sniper rifle before the arriving boat enemies.
    • The source refers to the completed mission by two slightly different wordings; the story index uses Clean Up After Donnie.

    Related guides and chapter order

    Part of our 91-story-mission directory. Buck Me · Fences and stolen goods. Depending on protagonist availability, some missions can be played in a different order than the published story recap.

    Sources and visual authenticity

    Primary mission reporting: VGC mission walkthrough, November 18, 2026. Existing featured media is original promotional or location artwork for context—not a captured frame from this particular mission. Controls can vary with accessibility settings; follow the prompt shown on your console.

  • GTA 6 Missable Missions Checklist: Shirley, Yago and Chapter Warnings

    GTA 6 Missable Missions Checklist: Shirley, Yago and Chapter Warnings

    Quick answer: GTA VI has optional missions that disappear if you wait too long. PowerPyx’s November 18 released-game mission index identifies an hourglass symbol for limited-time tasks. The listed missables are not required for the main 91-story mission sequence or PowerPyx’s standard 100% requirement, but they matter if you want to experience every side scene, character interaction and choice.

    Known limited-time optional tasks

    ChapterOptional questWhat makes it missable
    Chapter 1Get Shirley’s RumShirley’s favor appears once the early house/errand missions are available; ends by Tourist Trap
    Chapter 1Steal the ScooterSecond Shirley task after the rum errand; same Chapter 1 cutoff
    Chapter 3Race Against YagoYago sends an invitation after Bumper to Bumper; the opportunity has an hourglass marker
    Chapter 4This Is a Free Call From… / Pick Up ShaynaPowerPyx marks the Lucia-only event as time-sensitive; check the actual hourglass and text message on your save
    PowerPyx identifies these as examples of limited-time optional missions; this is not proof that absolutely no other missable interactions exist.

    Chapter 1: complete Shirley’s two errands first

    After Gear Up, Lab Fees, Just a Scratch and Unwanted Attention, look for Shirley near Jason’s Key Lento home. For her first favor, visit Three Sheets Liquor, ask the clerk for her specific rum and deliver it. PowerPyx reports this may also reveal an illegal exotic-animal front when you ask the clerk about unusual bird sounds in the shop.

    About one in-game day after returning the rum, Shirley may call Jason over again. Her second errand involves a scooter at a neighbor’s property and returning it to Shirley’s house. Both favors become unavailable once you begin Tourist Trap, according to PowerPyx. You do not need to finish the full story to receive them.

    Chapter 3: why the Yago race can disappear

    PowerPyx describes Race Against Yago as a post-Bumper to Bumper optional invitation that may arrive only after several in-game days. Look for a message from Yago, travel to the race meetup, select the Freeway Run event and complete the race. The guide reports a variable cash payout depending on position, including $3,800 for first place. Treat the marked limited-time activity as a priority instead of postponing it until the end of the chapter.

    Before Chapter 2: Recalibration warning

    Our Recalibration point-of-no-return guide outlines why an independent manual save matters. It includes a restricted-free-roam transition and the reported loss of the starting Key Lento home. However, the two Shirley quests expire even earlier, so a save just before Recalibration may already be too late to see them.

    FAQ: if I miss a quest, do I need to restart?

    Not necessarily. PowerPyx says these optional tasks do not gate the standard 100% checklist or trophy roadmap. If you personally want the exclusive story scene, you may need an earlier manual save. Do not delete your current playthrough or buy a different edition because an hourglass event expired.

    FAQ: what if the icon isn’t visible?

    Side tasks do not always appear immediately. Check map color conventions, phone messages, protagonists and mission prerequisites. PowerPyx distinguishes required pink story markers from optional and purple side-task markers. If a character has not contacted you yet, play another verified job or advance time normally.

    Source basis and editorial caution

    PowerPyx full mission guide · Shirley rum quest · Scooter quest · Yago race. The standard main story index is here. No invented quest timers or coordinates; dates and warnings verified November 18, 2026.

  • GTA 6 Recalibration Point of No Return: What to Save Before Chapter 2

    GTA 6 Recalibration Point of No Return: What to Save Before Chapter 2

    November 19: Recalibration Lucia won’t follow — identify the correct objective

    First check the intended progression: In Recalibration, Lucia leaves Cal’s back-yard area after the cooking/fishing sequence. PowerPyx says you should follow her toward the front of Cal’s house, interact/talk when she stops, then drive her back to your home. If you stay at the grill or wait at the boat, you may not be at the trigger location for the conversation.

    1. Confirm the fishing objectives and all three pieces of fish are fully cooked and that Cal has taken them.
    2. Walk along Lucia’s route to the front of Cal’s house. Look for her stationary interaction prompt, not a moving map marker.
    3. Approach, complete the dialogue and return to your vehicle. Do not expect Lucia to follow automatically while her conversation objective remains active.
    4. If she fails to respond or remains stationary after the prompt is completed, preserve your earlier chapter manual save before trying a standard checkpoint reload or clean game restart. Some community guides suggest reloading, but this is not a confirmed permanent fix.

    Important spoiler-light warning: this part of Chapter 1 leads into a restricted sequence with lost free-roam access; protect an early manual save and manage pocket cash before advancing. The existing point-of-no-return guidance below covers this. Source: PowerPyx’s released-game Recalibration sequence. No official Rockstar softlock patch is confirmed for the reported follower symptom.

    Important spoiler-light warning: Recalibration appears in PC Gamer’s Chapter 1 story list and, according to PowerPyx’s November 18 firsthand walkthrough, starts a sequence that restricts free roam until Chapter 2. If you still want to explore the original Key Lento home or finish chapter-specific optional jobs, create a separate manual save before proceeding. This is a much more important story boundary than a typical waypoint.

    Before Recalibration: practical safety checklist

    • Save in a new slot: use the pause menu’s manual Save/Load system; keep an earlier chapter save instead of overwriting the only slot.
    • Complete the Shirley side quests: both Get Shirley’s Rum and Steal the Scooter can disappear earlier when Tourist Trap begins, so don’t wait until Recalibration to do them.
    • Spend or secure pocket cash: PowerPyx reports a cash-loss transition at the mission and recommends placing money into BuckMe Family Savings before continuing. Remember that Family Savings deposits cannot be withdrawn.
    • Check the house: PowerPyx warns Jason’s original Key Lento home becomes unavailable as a permanent property after the chapter transition.
    • Finish any optional free-roam activities you care about: distinguish chapter-exclusive interactions from collectibles that can be found later. Not every missing icon means a trophy is ruined.
    • Record the story marker and game version: some Chapter 1 missions can appear in slightly different playable orders.

    How the mission itself starts

    PowerPyx states Lucia calls Jason after a chain involving Donnie; the mission marker then moves to Jason’s home in Key Lento. Once started, the objectives include visiting Cal, a fishing outing and a cookout sequence. The narrative events around this are intentionally not recounted here because they include significant plot revelations.

    What changes after the mission?

    FeatureReported changePractical advice
    Free roamRestricted for a linked story sequence toward Chapter 2Complete errands and manual save first
    Key Lento houseNo longer available as the original home laterDo not leave all planned early activities for later
    Jason’s carried cashPowerPyx reports it can be lost through this transitionReview BuckMe before beginning; avoid irreversible transfers unless intended
    Chapter 1 side questsSome have earlier expiration than RecalibrationFinish hourglass tasks as soon as they appear
    ReplayPowerPyx reports no conventional in-game mission replay featureRetain multiple manual save slots
    Based on PowerPyx November 18 first-playthrough warnings, not an independently tested save-file experiment.

    Recalibration objective outline (limited spoilers)

    Follow the active marker from home, collect the requested six-pack for Cal, visit his place, take the boat out and complete the fishing prompt, then assist with preparing food at the grill. The mission continues through character dialogue and a return journey. The detailed objective source is linked below; if your prompt is different, check the current patch and chapter progress.

    Does missing Shirley’s quests block 100%?

    PowerPyx says the two Shirley quests are optional chapter-specific content, not required for the standard 100% or trophy checklist. Missing them can mean losing their characters’ unique scenes or small rewards, but don’t tell players their 100% run is irreparably ruined without direct evidence.

    Sources and nearby help

    PowerPyx Recalibration walkthrough and point-of-no-return warning · PC Gamer 91-story mission list · BuckMe guide · Missable quest checklist. Featured media is official promotional artwork, not mission footage. Review date: November 18, 2026.

  • GTA 6 Buck Me Walkthrough: Open a Bank Account and Understand Family Savings

    GTA 6 Buck Me Walkthrough: Open a Bank Account and Understand Family Savings

    Quick answer: This spoiler-aware GTA 6 Buck Me guide covers the required early-game objectives, choices, locations and common questions. Mission steps are grounded in walkthroughs published on November 18, 2026, rather than claimed firsthand gameplay by The Leonida Scene.

    Mission details

    PC Gamer story listChapter 1 · mission #12
    Starting areaFleeca Bank, Key Lento
    Who starts itLucia; Jason starts the mission
    How to unlockLucia phones around half a day after Coming Home, according to PowerPyx
    Reported reward / featureBuckMe banking app and a reported $100 welcome credit
    Number from PC Gamer’s 91-story directory; steps and rewards attributed to individual guide reporting.

    Step-by-step mission walkthrough

    1. Wait for Lucia’s bank call

    After Coming Home, advance time normally and monitor Lucia’s phone messages. The source reports that the bank errand begins after a delayed call, not as an always-visible icon at the start of Chapter 1.

    2. Meet the staff inside Fleeca Bank

    Travel to the Key Lento branch and ask the teller about opening an account. Follow their direction to the manager’s office rather than looking for a cash deposit machine first.

    3. Get the BuckMe app

    The conversation leads to a fintech app rather than a normal branch account. After the scene, open the phone and find the purple BuckMe app icon.

    4. Move the welcome credit into savings

    PowerPyx reports a $100 introduction deposit. In the app, open the checking account and select the transfer into Family Savings, following the marked tutorial.

    5. Understand the irreversible decision

    Money put into Family Savings is reported nonwithdrawable. Reaching savings thresholds unlocks discounts and expanded checking limits; avoid moving all flexible money there until you’ve considered planned purchases.

    Secrets, choices and discoveries

    • An early-stage alternate option is the floorboard stash in Jason’s bedroom; see our linked guide.
    • A savings deposit can unlock discounts but should be treated differently from cash you can spend today.
    • This mission provides a lasting progression system, not a one-time robbery payout.

    Frequently asked questions

    When do I unlock banking in GTA VI?

    Buck Me in Chapter 1, after Coming Home and a follow-up call from Lucia.

    Where is the BuckMe app?

    Open the in-game phone and look for the purple BuckMe icon after the bank scene.

    Can I withdraw from Family Savings?

    PowerPyx says deposits to Family Savings are irreversible; use ordinary checking or pocket cash for spending.

    Why did a payment not enter checking?

    The source says incoming money may be held when your checking limit is reached. Review the app limits rather than assuming the payment vanished.

    How do I find an ATM?

    The banking app reportedly includes ATM Finder/Set Destination, which can help deposit or withdraw pocket cash.

    Adjacent missions and related help

    Return to the complete five-chapter mission index. Related guides: coming home walkthrough lucia prison gifts · early cash stash jason floorboards buck me · banking cash death arrest.

    Source checks and screenshot policy

    Primary: published objective-level mission guide (November 18). Cross-reference: second published guide or story index. These are original explanations of source-backed gameplay facts; controls and objectives may vary with an update. This page includes mission-mechanic spoilers, not a reproduction of another site’s prose. The featured visual is existing GTA VI editorial/promotional imagery, not a verified gameplay screenshot from this exact mission.